
The first nib you buy will quietly decide how the next few months go. Not because some nibs are good and others are bad, but because each one asks something different of your hand. Hand a beginner a razor-fine, wildly flexible nib and the ink splatters, the tines splay, the paper fibres lift — and the beginner concludes they have no talent, when in fact they were simply given the wrong tool for week one. Hand the same person a firm, forgiving nib and something clicks within days.
What follows is the short version of what matters: how pointed nibs work, why stiff and flexible nibs feel like different instruments, how to match a nib to a holder, and a practice order that won't waste your first month.
What a pointed nib actually is
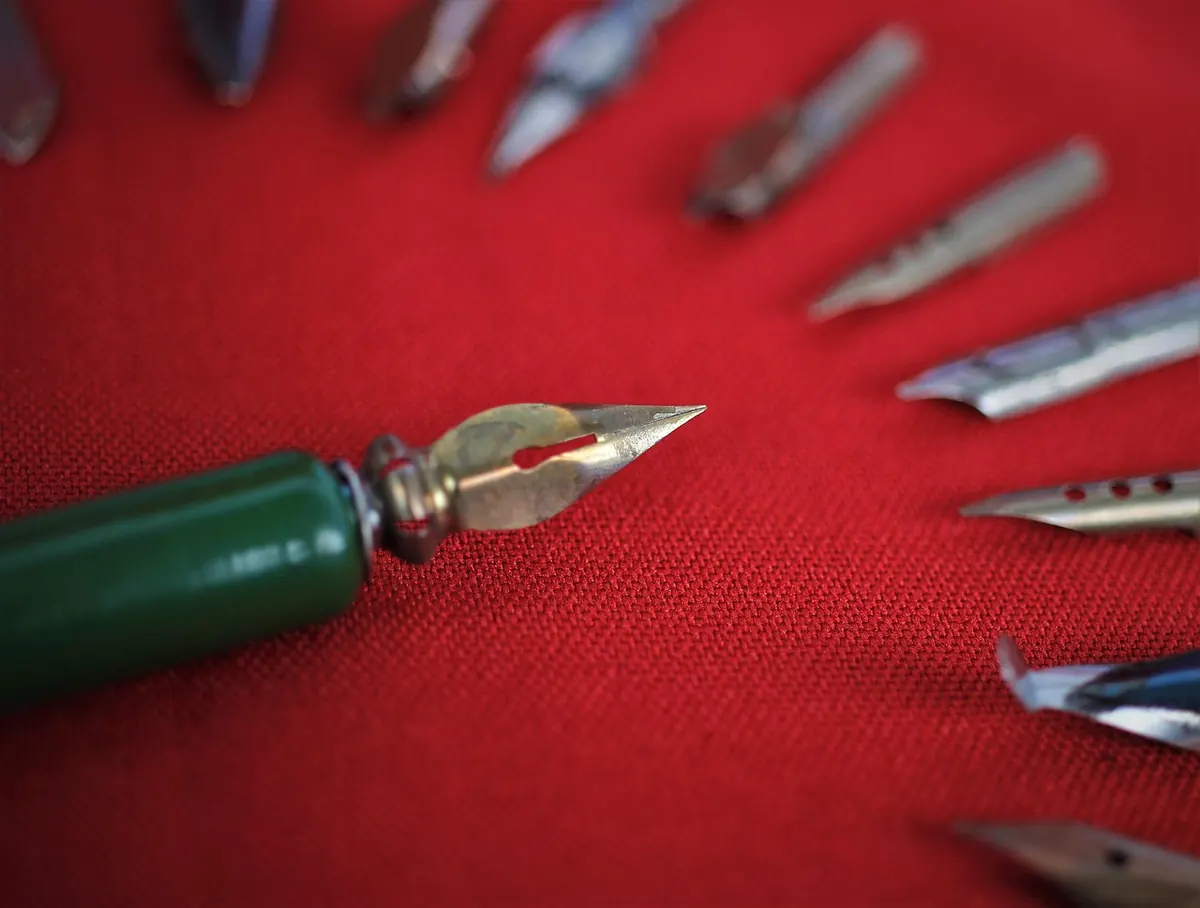
A pointed nib is a small steel tool with two tines that meet along a slit and end in a fine tip. Press, and the tines separate and the stroke widens; release, and the steel springs back and the line thins. Everything else — the shoulders, the vent hole, the shank, the alloy, the temper — exists to serve that one movement.
Three physical details tell you most of what a nib will feel like before you ever dip it:
- Tine length and taper. Long, slender tines that narrow gradually flex easily and give dramatic thicks. Short, wide tines resist.
- Metal thickness. Two nibs can look identical and behave completely differently if one is pressed from heavier stock.
- The tip. A needle-fine point catches on rough paper; a slightly blunter tip glides.
There is also snap — how quickly the tines close after pressure. Good steel returns crisply, stroke after stroke. A poor or over-worked nib stays slightly open, and once that happens it is sprung and nothing will fix it. This is why nib choice is not just about line width. A nib with quick snap teaches your hand to release pressure at the right moment; a tired nib teaches bad habits because it never quite closes.
Stiff nibs versus flexible nibs
Stiff nibs give a narrow range of line variation and a wide margin for error. Press harder than you meant to and the line thickens a little rather than exploding. That is why firm nibs suit beginners: they let you concentrate on letterforms, slant and spacing without punishing every wobble. The Nikko G and Tachikawa G are the usual first recommendations, and the Hunt 22B and Gillott 404 belong in the same conversation — firm, reasonably smooth, tolerant of a hand that hasn't learned restraint. The Zebra G is stiff enough for a beginner but has a reputation for sharpness; on textured paper it will catch.
Flexible nibs are another instrument entirely. The Gillott 303, Hunt 101, Leonardt Principal EF and Brause 66EF produce exquisite hairlines and deep, velvety shades — and they punish a heavy hand instantly. The 303 is a beautiful, terrible first nib: it rewards delicacy and sprays ink the moment you lean on it. The 66EF is finer and more fragile still, and springs easily in unskilled fingers. The difference is easiest to feel on a single downstroke: with a firm G nib, a little extra pressure makes a slightly fuller line; with a flexible nib, the same pressure opens the tines wide and turns a controlled shade into a blot.
A word about "beginner nib"
It is not a lower grade of nib. A Nikko G is not a Gillott 303 with the training wheels on; it simply does a different job well. Plenty of working calligraphers keep a firm nib for daily practice and save the flexible ones for finished work.
A sensible order to practice in
Work through nibs by temperament, not by prestige. Each stage should last until the skill it teaches becomes automatic — for most people practising a few times a week, a few weeks per stage.
- Firm first. A Nikko G or Hunt 22B. Spend sessions on entry strokes, straight downstrokes, overturns and compound curves. The goal is a hairline that is genuinely thin and a downstroke that is consistent, not fast.
- Add moderate flex. Move to a Gillott 404 or a Brause 361 Steno. Here you learn the middle of the pressure range, where most of the control lives.
- Then the flexible nibs. A Gillott 303 or Hunt 101 once you can fill a page without a single accidental swell.
- Save the specialists. Leonardt Principal EF, Brause 66EF and crowquill nibs are for a hand that already knows what a light touch feels like.
If you find yourself fighting a nib, put it aside for a month rather than grinding through it. A nib you dread teaches nothing.
A useful rule for the first month: if you cannot tell whether the nib or your hand caused a bad stroke, the nib is probably too flexible for the job.
Matching nib to holder
Two holders cover almost everything: a straight holder and an oblique. A straight holder keeps the nib in line with the shaft. An oblique has a flange that offsets the nib to the right and angles it back towards you, so the nib sits at the steep angle pointed-pen scripts need without your wrist twisting into a knot. If you intend to learn Copperplate or Engrosser's Script, the oblique is not a luxury — it is the tool that makes the script comfortable.
If you are unsure, start with a straight holder for basic drills and add an oblique once you begin a slanted script seriously. A cheap oblique with a fixed flange can be frustrating; an adjustable flange lets you set the nib angle to your hand rather than forcing your hand to fit the holder.
Will my nib fit?
Most standard pointed nibs — the G series, most Hunt and Gillott nibs, the Brause nibs — share a similar shank and fit a universal holder with a four-prong ferrule. Watch for these exceptions:
- Crowquill nibs such as the Hunt 102 are much smaller and need a crowquill holder with a narrow ferrule.
- Some nibs sit loose in a universal ferrule. A sliver of paper as a shim holds them; an adjustable flange is the better long-term answer.
- Don't push the nib so deep that the vent hole disappears inside the ferrule — it stiffens the nib and makes cleanup harder.
Ink, paper, and the first practice session
The nib is only one part of the equation. A firm nib can still feel terrible if the ink is too thick, and a flexible nib can seem uncontrollable if the paper is too rough or too absorbent. For early practice, choose a smooth, sized paper that can take a little ink without feathering — layout paper, smooth Bristol board, or a decent practice pad made for pen work. Avoid heavily textured watercolour paper and anything with visible recycled fibres until your touch is lighter.
Dip just far enough to load the nib, usually to the vent hole rather than the whole shank, and wipe the back of the nib lightly on the ink bottle rim. If ink pools on the top of the nib, it will drop onto the page at the worst moment. Load again before the line starts to fade rather than pressing harder to squeeze out the last drop.
- Warm up with three strokes. One hairline, one controlled downstroke, one overturn. If the hairline is ragged, your touch is too heavy or the ink is too dry.
- Keep sessions short. Fifteen focused minutes beats an hour of gripping the holder too tightly.
- Check your posture. Sit square to the desk, keep the paper angled, and let the forearm do the work rather than the fingers alone.
Cleaning, storage, and when to retire a nib
Pointed nibs last longer with a little routine. Rinse the nib in clean water after each session, dry it thoroughly with a soft cloth, and store it somewhere dry. Do not leave a nib sitting in water or ink for days; rust starts at the slit and shoulders, and a rusted nib will never feel smooth again. If ink has dried in the vent hole, a soft old toothbrush and a drop of mild soap will usually clear it, but avoid scraping the tines with anything metal.
A nib is not automatically finished when it feels scratchy. Check the tip with a magnifier: a tiny hook can sometimes be smoothed on fine abrasive paper, but a bent or crossed tip cannot be rescued. Retire the nib to practice drills or throw it away. More importantly, watch for springing. If the tines no longer meet cleanly at rest, or if one tine sits higher than the other, the nib has lost its snap and will keep disappointing you.
The right first nib is the one that lets you practise without flinching. Start firm, learn what a clean hairline feels like, and move towards flexibility only when your hand can stay light under pressure. The flexible nibs are not going anywhere — and by the time you reach them, they will feel less like a test and more like a reward.
Photo: Carola68 / Pixabay